|
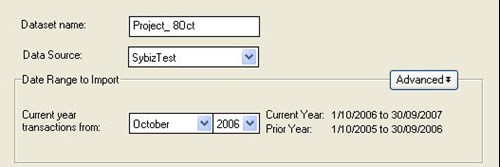
Choosing the Import button from the new tab in the "Welcome to Salesmatrix" Screen launches this screen, the first in a series of steps allowing entry of data into Salesmatrix.
- Dataset name: Provides a name for the Sales Analysis and the directory in which the Salesmatrix data is stored.
Data to Import
- Current year transactions from: is the month that Data will be imported from, starting with the 1st day of the month.
- Data Source: The Data Source Name (DSN) set up in the ODBC control panel to connect to ODBC for the import process.
If no DSN is chosen you will be presented with the Select Connection or Data Source window when you click the 'OK' button.
- Advanced:
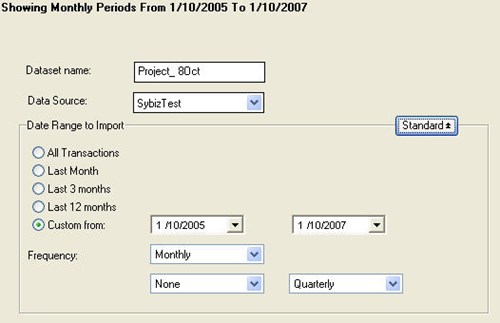
Frequency
Choose the frequency of the periods for the alternative period settings. If the periods are weekly based, then you will have the option appear of when the weeks start each year.
Custom From...Until
Choose the date range by either typing in the date or picking it from the drop-down box. Below this are an additional two drop-down boxes for the categories that each of the periods created will be categorized into.
Description
Although this may appear to be a fixed description, the description at the top of the screen can be edited to better reflect the period description that suits the purpose of the dataset.
|